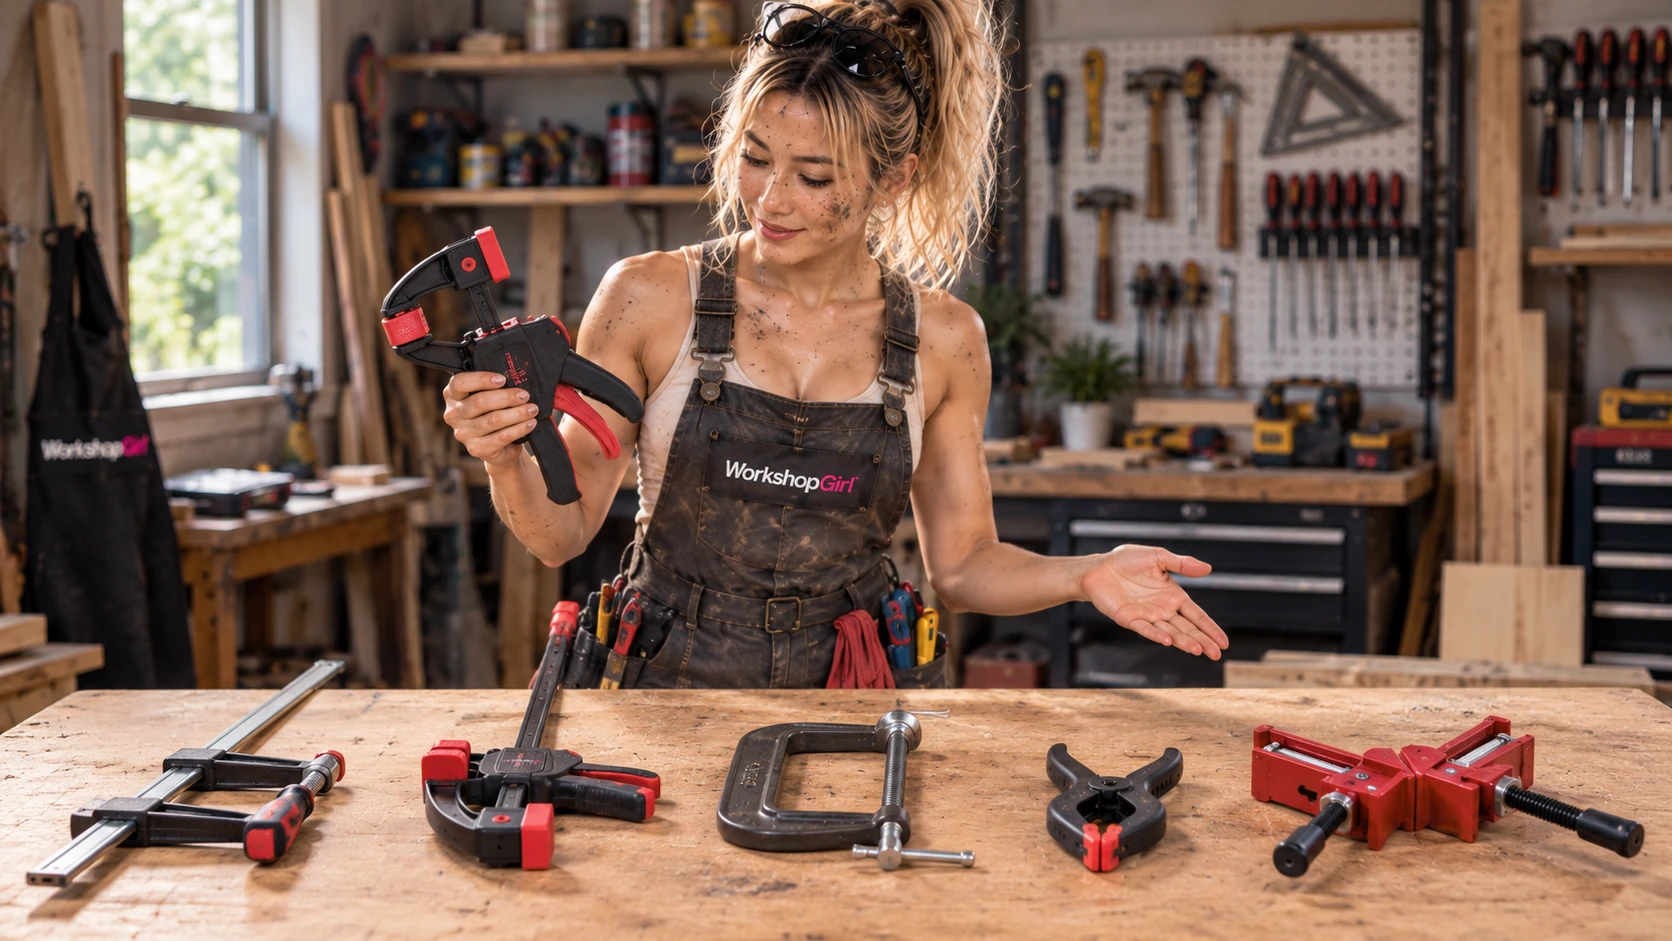
What does a clamp actually do?
A clamp is a temporary third hand. It can hold parts in place while you mark, drill, saw, assemble or glue them. It can also help align two edges, resist movement, or maintain contact while an adhesive cures. The useful question is not “How hard can I tighten this?” but “What movement am I trying to prevent?”
More clamping force is not automatically better. Excess pressure can bow a board, distort an assembly, crush a soft surface or squeeze too much adhesive out of a joint. Clamp firmly enough to do the job—not as hard as physically possible. Pads or scrap blocks can spread pressure and protect the work, but make sure they do not slip.
Common types of clamps
The names overlap a little: “bar clamp” is often used broadly, while an F-clamp describes a familiar frame shape that slides along a bar. Capacity and force depend on the specific clamp, so check its rating and intended use.
1. F-clamp or bar clamp
A long bar carries a fixed jaw and a sliding jaw. A threaded screw advances one jaw to tighten the work. The bar gives useful reach, which makes these clamps a common choice for woodworking assemblies, panel glue-ups and holding larger pieces together.
Before buying, compare the maximum opening, throat depth (how far the jaw reaches from the bar), bar stiffness and jaw-pad design. A long opening does not guarantee a deep throat or a particular clamping force.
2. Quick-grip, one-handed clamp
A trigger moves a sliding jaw along a bar, so you can position and tighten many models with one hand. They are handy for temporary holding, light-to-medium assembly, securing a guide, or getting pieces into position while another clamp is added.
Quick adjustment is convenient, but it does not make every model a substitute for a heavier screw clamp on a demanding glue-up. Check the tool’s rating and whether it is designed to convert into a spreader before reversing its jaws.
3. C-clamp
A rigid C-shaped frame and threaded screw concentrate pressure in a compact space. C-clamps are useful for small assemblies, metalworking, securing a component to a bench, or jobs where a larger bar clamp will not fit.
The small contact faces can mark or dent a soft or finished surface. Use suitable pads or a scrap caul, and check that the frame and work are positioned securely before tightening.
4. Spring clamp
A spring-loaded hinge opens the jaws when you squeeze the handles and closes them when you let go. Spring clamps are quick and simple for small parts, templates, light positioning and temporary holding.
Their pressure and jaw opening are limited by the particular clamp. They are not the universal replacement for a bar clamp when a larger joint needs even, adjustable pressure.
5. 90-degree corner clamp
A corner or angle clamp uses shaped jaws to hold two pieces near a right-angle relationship while you assemble a box, frame or cabinet-style joint. It can make the parts easier to position while you fasten or glue them.
A corner clamp helps position the parts; it does not prove they are square. Check the actual assembly with a reliable square or by comparing diagonals where appropriate.
Clamping a wood glue-up
Imagine joining several boards edge-to-edge to make a wider panel. Clamps bring the mating edges into contact and help keep the boards in position while the adhesive cures. The goal is a well-fitted joint held in alignment—not a contest to see how much force the clamps can apply.
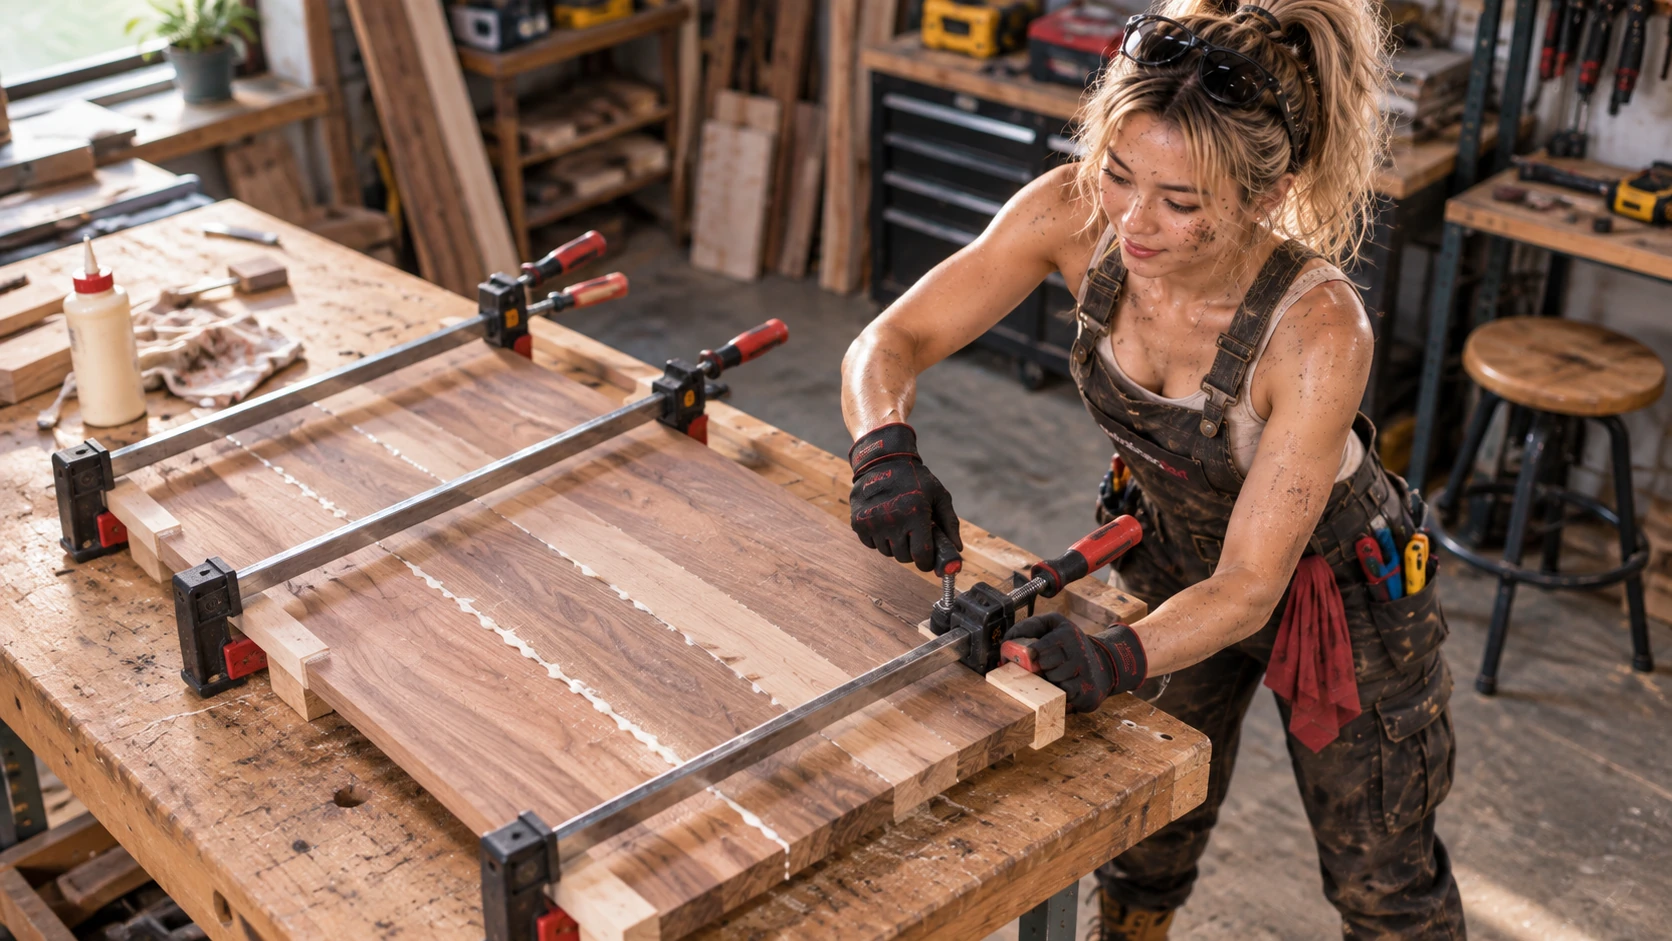
Dry-fit the boards before applying glue so you can confirm their order, orientation and joint fit. Lay out enough suitable clamps to support the assembly, then apply adhesive as its maker directs. Position clamps sensibly along the panel and tighten them progressively; do not fully crank down one clamp before checking the rest of the assembly.
As pressure comes on, watch the board faces and edges for shifting or bowing. A small amount of squeeze-out can be a useful sign that the joint closed, but excessive squeeze-out may mean too much glue or pressure, and cleanup method depends on the adhesive and finish. Follow the adhesive maker’s instructions for clamp time and cure time before stressing or moving the panel.
There is no universal pressure number for every glue-up. Appropriate pressure depends on the wood species, how well the joint fits, the adhesive, clamp type and workpiece dimensions. A sound joint and the adhesive maker’s instructions matter more than an arbitrary setting.
Clamping is not the same as alignment
A clamp can hold components firmly while the assembly is still slightly out of square. Parts can shift as pressure is applied, and a corner clamp may hold the edges together without correcting a cut that is not quite 90 degrees. Clamping answers “Are these pieces being held?” A square answers “Is this angle actually right?”
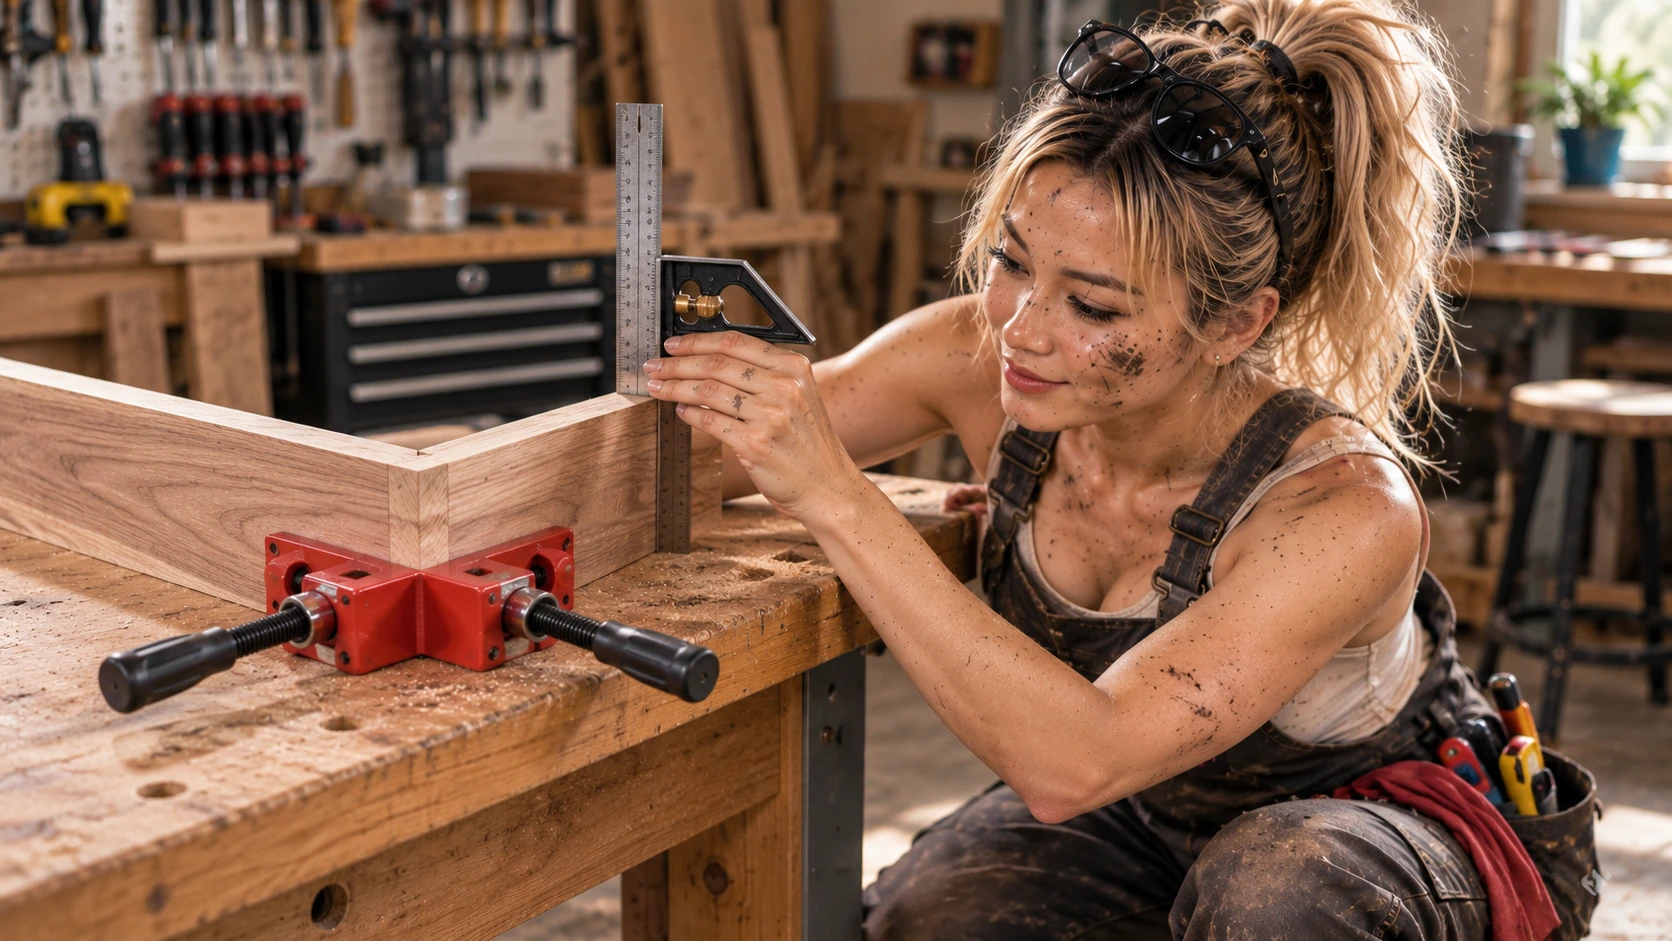
In the corner-clamp example, two boards meet at approximately a right angle while the clamp maintains their position. The combination square checks the angle itself. Those tools do different jobs: the clamp holds; the square checks. Verify the assembly after tightening and make small adjustments before fastening or leaving glue to cure.
Which clamp should a beginner buy first?
Start with the work you expect to do, the size of the parts and how much reach you need. This is a useful starting point, not a rule that every project must follow:
General woodworking assembly
An F-clamp or bar clamp offers reach and adjustable screw pressure.
Fast temporary positioning
A one-handed quick-grip clamp is convenient when speed and repositioning matter.
Small or light holding
A spring clamp is simple for templates, small parts and temporary setups.
Compact localized pressure
A C-clamp fits small spaces; protect delicate surfaces with suitable pads.
Right-angle assembly
A corner clamp can help position a frame or box joint; still check it for square.
Panel glue-up
Several appropriately sized bar or F-clamps can distribute pressure across the panel.
What to look for when buying clamps
Choose clamps by the workpiece and job rather than the largest force claim on the package. Useful details to compare include:
Will the jaws span the work and reach the spot that needs holding?
Does the clamp suit the span and load without visibly flexing in normal use?
Is force adjustable, and are the contact surfaces broad or replaceable enough to protect the material?
Can you tighten it comfortably, and does it adjust at a useful speed for your workflow?
Will it fit the project and your workspace? Check any stated rating and intended use.
Several appropriately sized clamps are often more useful than one enormous clamp that is awkward on smaller work. You can add a specialized style later when a real project calls for one.
How many clamps do you need?
Woodworkers have a running joke that the correct number of clamps is always one more. The practical answer depends on project scale: a small repair may need one or two, while a wide panel or frame may call for several clamps placed to support the assembly evenly. Start with a few versatile clamps, learn what your projects actually require, and add sizes or styles when you meet a specific need.
Quick beginner checklist
Before tightening a clamp, pause and check:
- Is this the right clamp for the job?
- Are the jaws contacting solid, stable surfaces?
- Could the jaws damage the workpiece or its finish?
- Is the workpiece aligned before pressure is applied?
- Is the clamp pulling the parts in the direction I intend?
- Am I using controlled rather than excessive pressure?
- If this is a square assembly, have I actually checked it for square?
Clamp FAQ
How tight should I make a clamp?
Tight enough to hold the work or close a properly fitted joint, without bowing, crushing or shifting the pieces. The right pressure varies with the material, adhesive, clamp and joint.
Can quick-grip clamps be used for glue-ups?
Some models can help with light or medium assemblies, but capacity and pressure vary. Check the clamp’s rating and use an appropriate setup for the size and demands of the glue-up.
Does a corner clamp guarantee a 90-degree corner?
No. It helps position two pieces, but the parts or cuts may still be out of square. Check the assembled corner with a square and adjust it before the joint is fixed.
Do clamp jaws need pads?
Pads or scrap cauls can spread pressure and protect soft or finished surfaces. Keep them clean and stable so they do not slip or introduce a new alignment problem.
How long should a glue-up stay clamped?
It depends on the adhesive, temperature, joint and work. Follow the adhesive manufacturer’s clamp-time and cure-time instructions, and avoid stressing the joint too early.
Final thoughts
Clamps do more than squeeze: the right one holds pieces steady, brings a joint together or helps maintain position. Choose for the workpiece and direction of force, tighten with control, then measure what matters. That habit makes a small clamp collection go a long way as your projects grow.