
A modern drill/driver is really two closely related tools in one: the drill makes holes, while the driver drives and removes screws. This guide shows how to use both sides of the tool without fighting it.
Know Your Cordless Drill
Controls vary by manufacturer, but most drill/drivers have the same useful parts:
- Chuck: the jaws that hold a drill or driver bit.
- Clutch or torque ring: limits torque during screw-driving on many models.
- Drill mode: typically bypasses the adjustable clutch for drilling.
- Gear selector: where fitted, a lower gear favors control and torque while a higher gear favors speed.
- Trigger: often variable-speed, so pressure controls speed.
- Forward/reverse selector: changes rotation direction; its center position often locks the trigger.
- Battery: supplies portable power.
How to Install a Bit
- Make sure the trigger is not being pressed.
- Open the keyless chuck jaws.
- Insert the correct bit straight into the chuck.
- Tighten the chuck securely, then check that the bit is centered.
- Give it a visual check before use.
Never grab a spinning chuck. A poorly centered bit can wobble, make an oversized hole and put unnecessary stress on the tool.
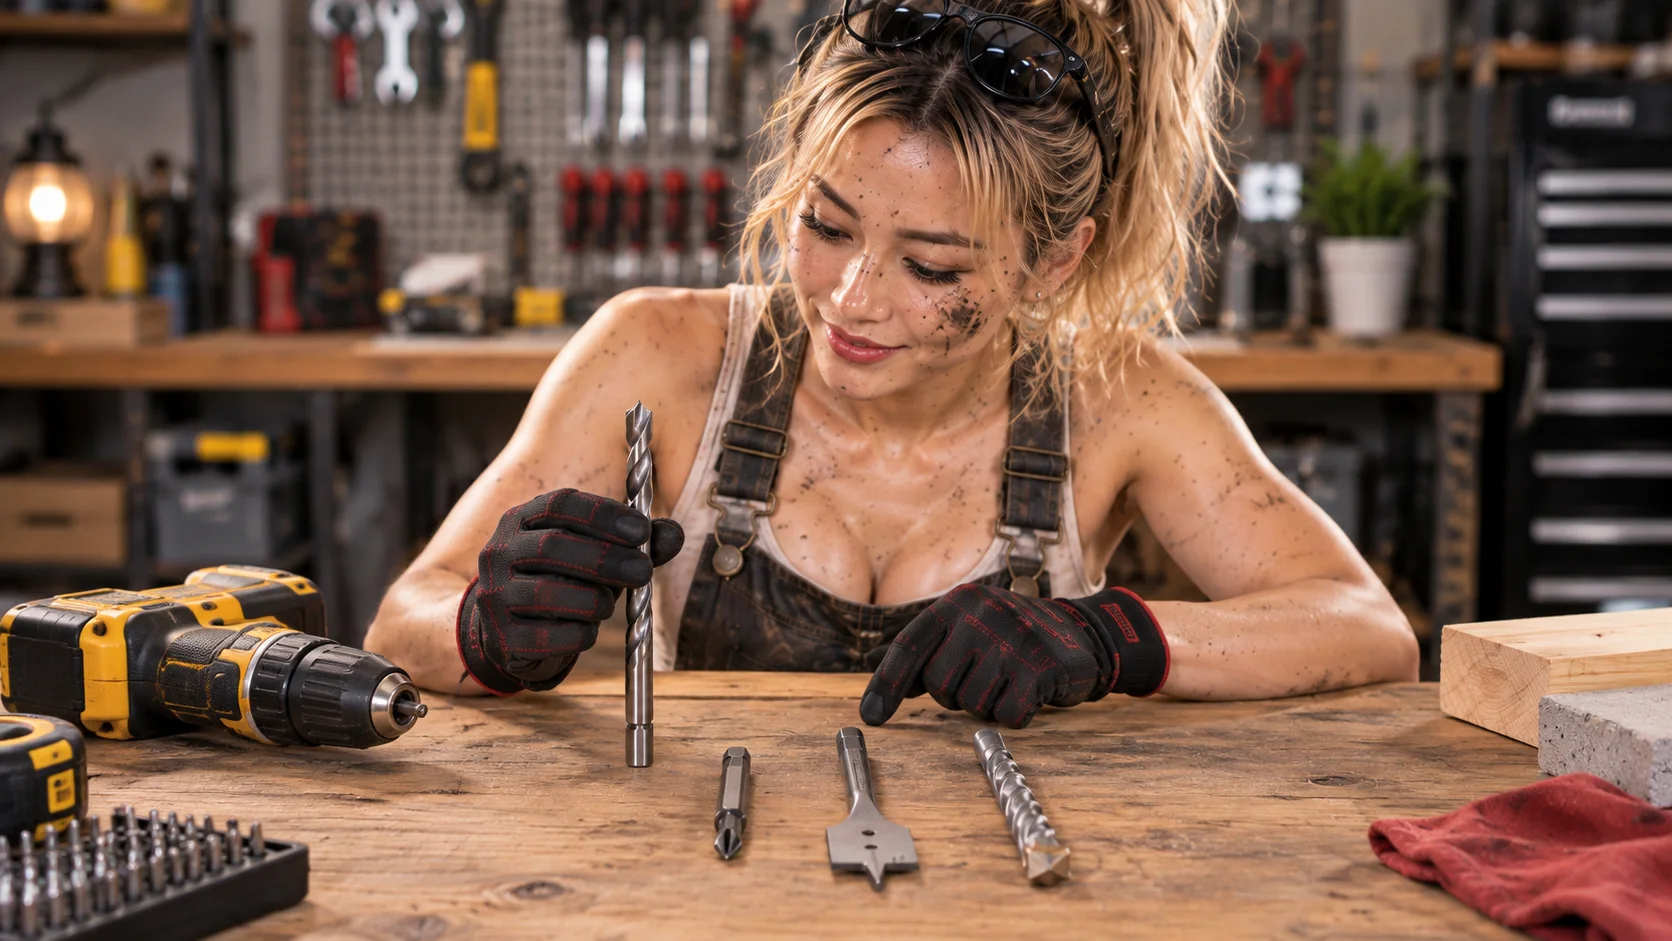
Basic Bit Types
Twist drill bit
A common general-purpose drilling shape. Twist bits are made for different materials, so do not assume one bit works equally well in wood, metal and plastic.
Driver bit
A driver bit engages a screw head. Match both its profile and size; a poor fit encourages cam-out and damaged screw heads.
Spade bit
Commonly used for relatively large holes in wood. It needs controlled drilling and is not a substitute for every other bit style.
Masonry bit
Designed for masonry and recognizable by its specialized tip. Use the appropriate tool and operating mode for the material; a normal drill does not automatically perform like a rotary hammer.
Need help matching a cutter to the job? See our guide to choosing the right drill bit for wood, metal, masonry and more.
Drill Bit vs Driver Bit
A drill bit cuts or removes material to create a hole. A driver bit engages a screw or fastener so the drill/driver can rotate it. That is why the pilot-hole image and the screw-driving image show different operations.
How to Drill a Pilot Hole
- Identify and mark the drilling location.
- Secure the workpiece with clamps.
- Select an appropriate bit, install it and check that it is centered.
- Position the bit at the mark and keep the drill aligned.
- Start slowly, then increase speed appropriately once the bit is established.
- Let the bit cut rather than forcing the tool.
- Withdraw under control.
A pilot hole guides the screw, reduces wandering, can reduce the risk of splitting wood and often makes installation easier. There is no universal pilot-hole diameter: the right choice depends on the screw, material and application.
Wear task-appropriate eye protection, secure the workpiece, tie back loose hair, keep loose clothing away from rotating parts, keep fingers clear, remove a chuck key before operating an older keyed chuck, use the correct bit, and stop if the bit binds or anything feels wrong. PPE choices depend on the task; avoid loose gloves near exposed rotating machinery.
Forward, Reverse and Variable Speed
Forward is normally used for drilling and driving standard right-hand-threaded screws. Reverse is commonly used to back screws out. Check the symbols on the actual tool, and do not change direction while the drill is spinning unless the manufacturer specifically supports it.
With a variable-speed trigger, light pressure gives lower speed and more pressure gives higher speed. Starting slowly helps establish the bit, improves control and helps the driver bit engage the screw.
Clutch, Torque and Drill Mode
The numbered clutch ring is primarily useful during screw-driving. A lower setting slips at lower torque; a higher setting allows more torque before slipping. The drill symbol typically bypasses the adjustable clutch for drilling.
Clutch numbers are not standardized torque specifications. Start lower when appropriate and adjust gradually for the actual screw and material. The clutch is not the same precision function as a calibrated torque wrench.

How to Drive a Screw
- Use the correct driver bit and match it accurately to the screw head.
- Set forward direction and choose an appropriate clutch setting.
- Align the bit with the screw axis and apply enough pressure to keep it engaged.
- Start slowly and increase speed only as needed.
- Slow down near final depth and stop when the screw is properly seated.
Do not bury every screw as deeply as possible. If the bit repeatedly jumps out, stop and investigate the bit type, size, alignment, pressure, speed, torque, and condition of the bit and screw.
What Does the Clutch Actually Do?
The motor turns the transmission, the transmission turns the chuck, and resistance rises as the screw seats. At the preset threshold, the clutch slips or clicks so less torque is transmitted. It limits drive force; it does not turn the drill into a calibrated torque wrench.
Drill vs Impact Driver — A Short Introduction
A cordless drill/driver is highly versatile for holes and many fastening jobs. An impact driver uses a different mechanism and is optimized for many fastening tasks. See our full guide to the difference between a cordless drill and an impact driver for a closer look at their mechanisms, bit holders and best-fit jobs.
Common Beginner Mistakes
- Using the wrong bit or a dull/damaged bit
- Failing to clamp the workpiece or holding it by hand
- Starting too fast or forcing the drill
- Leaving the chuck loose or installing the bit off-center
- Using drill mode when clutch control would help screw-driving
- Using too much clutch setting or stripping a screw head
- Poor alignment, hands too close, or ignoring eye protection
- Assuming every material uses the same bit and speed
Battery Basics and Tool Care
Use batteries designed for the specific tool platform. Inspect packs and avoid visibly damaged ones. Use manufacturer-compatible charging equipment, keep contacts reasonably clean and dry, and store the battery according to its manufacturer guidance. Keep the chuck and vents clean, and replace bits that are bent, blunt or damaged.
- Correct bit
- Bit centered and secure
- Correct direction
- Appropriate clutch/mode
- Workpiece clamped
- Eyes protected
- Hands clear
Drilling makes the hole. Driving turns the screw. Same tool — different job.
Cordless Drill FAQ
What is the difference between a drill and a drill/driver?
A drill makes holes; a drill/driver can also drive and remove screws using a driver bit and clutch.
What do the numbers on a cordless drill mean?
They generally represent clutch settings, not standardized torque values.
What does the drill symbol mean?
It typically bypasses the adjustable clutch for drilling, but confirm the behavior in your tool’s instructions.
Why does my drill keep clicking when driving a screw?
The clutch is reaching its limit. If the screw is not seated, check the bit, alignment, material and setting rather than simply adding speed.
Should I drill a pilot hole before driving a screw?
It depends on the material, screw and application. In wood it can guide the screw and reduce wandering or splitting.
How tight should the chuck be?
Tight enough to hold the bit securely and keep it centered, following the tool’s instructions. Never tighten or loosen it while spinning.
Why does my drill bit wobble?
The bit may be off-center, the chuck may be dirty or damaged, or the bit may be bent. Stop and inspect before continuing.
Can I use a cordless drill as a screwdriver?
Yes. Fit the correct driver bit, select forward, align carefully and use the clutch to control seating.
What is the difference between a drill and an impact driver?
A drill/driver is more versatile for drilling; an impact driver uses an impact mechanism optimized for many fastening tasks.
Final Thoughts
Good drilling is controlled drilling. Choose the right bit, clamp the work, start slowly, let the tool do the cutting and use the clutch when you are driving. Once those habits become automatic, the cordless drill becomes a remarkably friendly workshop tool.